
Autotask
Connect Autotask PSA to Uniportal so AI workflows can run directly from your service desk.
This guide walks through connecting Autotask to Uniportal, so technicians can run AI workflows directly from tickets.
Prerequisites
- Admin access to your Autotask instance. The Admin section used below is restricted to admins.
- Admin/Owner role in your Uniportal tenant.
Setup
Create a security level in Autotask
Uniportal connects as its own API user in Autotask, not as a technician, so it needs a security level scoped to exactly what it's allowed to touch.
-
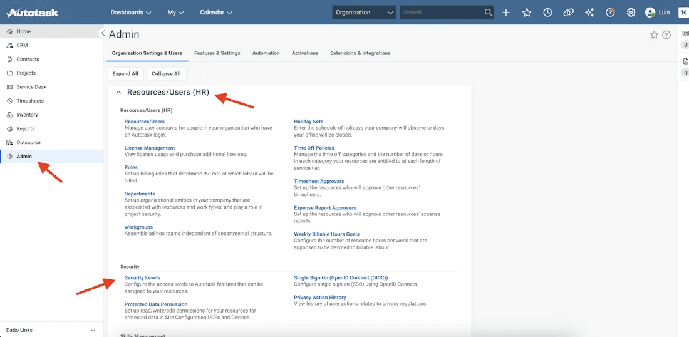
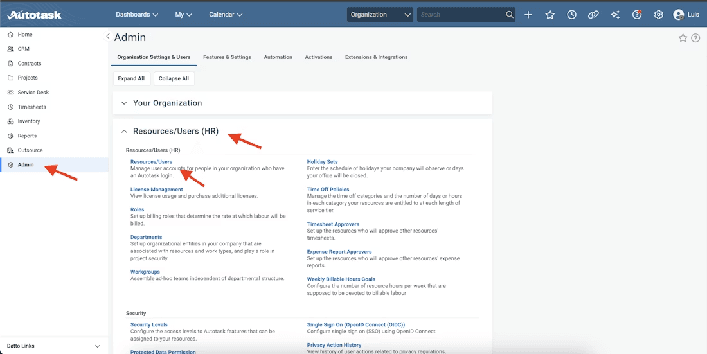
Go to Admin > Organization Settings & Users > Resources/Users (HR) > Security Levels.
-
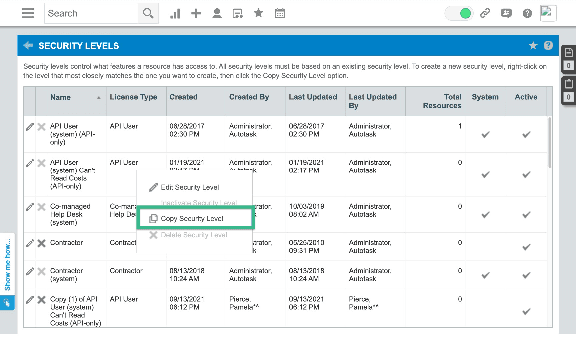
Find API User (system) in the list, right-click it, and select Copy Security Level to duplicate it. Starting from this level instead of a blank one matters: it already carries Autotask's baseline restrictions for a non-interactive, API-only account, so you're narrowing permissions from there rather than building an interactive user's access from scratch.
-
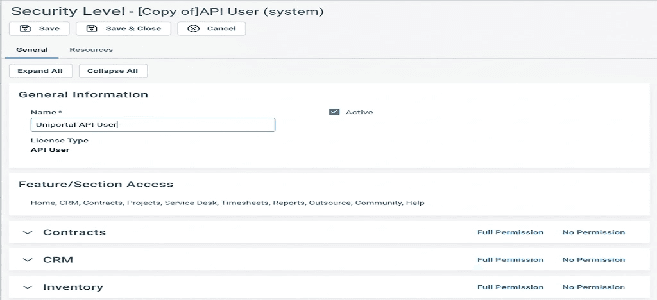
On the copy's General tab, rename it from "Copy of API User (system)" to Uniportal API User, so it's identifiable later.
Set permissions on the security level
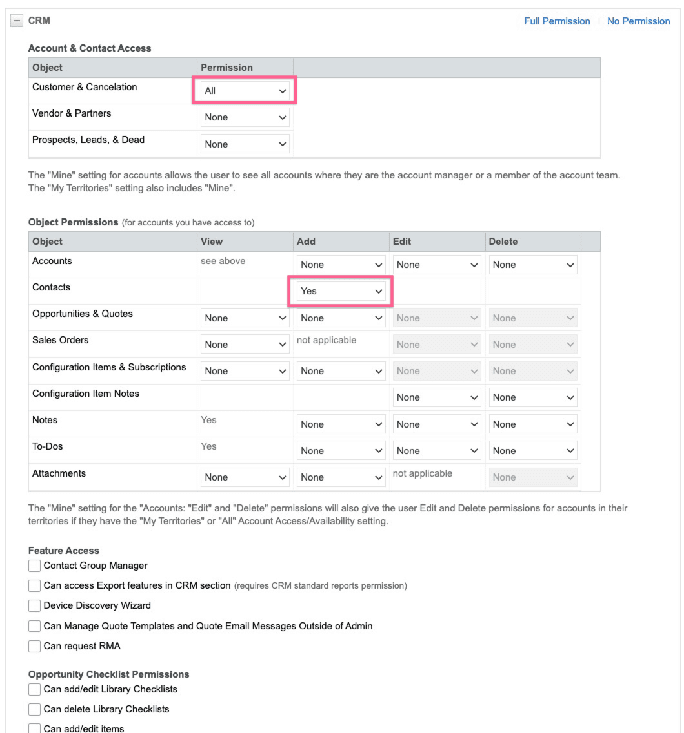
Under CRM > Account & Contact Access, set Customer & Cancellation to All, so the AI can look up any active account, not just ones it happens to be assigned to. Under Object Permissions, set Contacts > Add to Yes, so it can create a new contact when a ticket comes in from someone who isn't in Autotask yet.
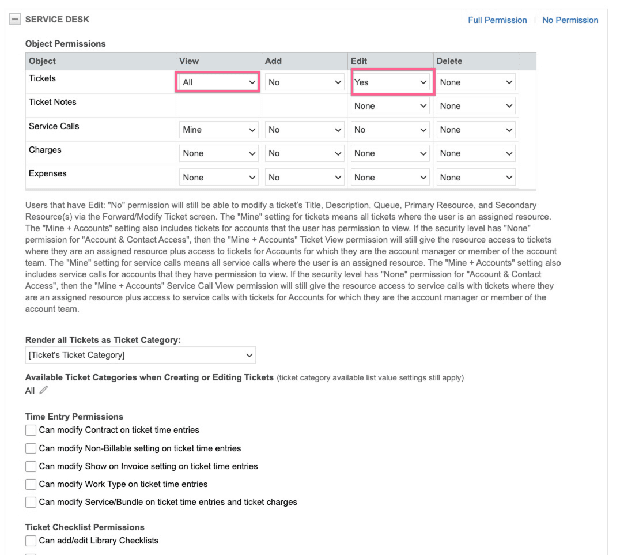
Under Service Desk, set Tickets > View to All and Edit to Yes. This is what lets the AI read and update tickets across your queues, not just ones already assigned to it.
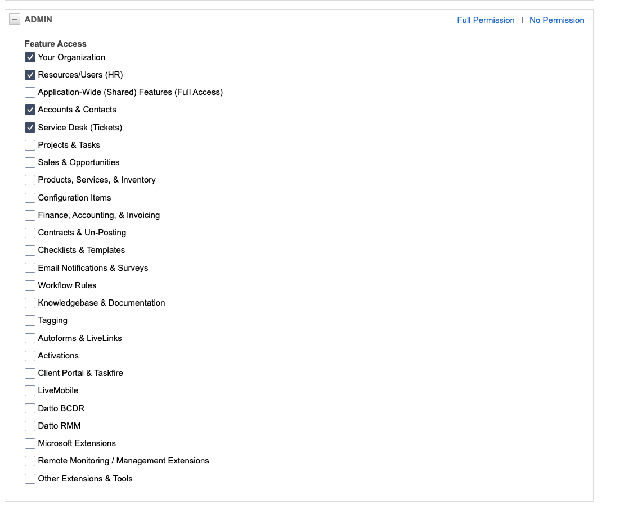
Under Admin > Feature Access, check Your Organization, Resources/Users (HR), Accounts & Contacts, and Service Desk (Tickets). This just exposes the sections you configured above to this security level, it doesn't grant anything beyond what you already set there.
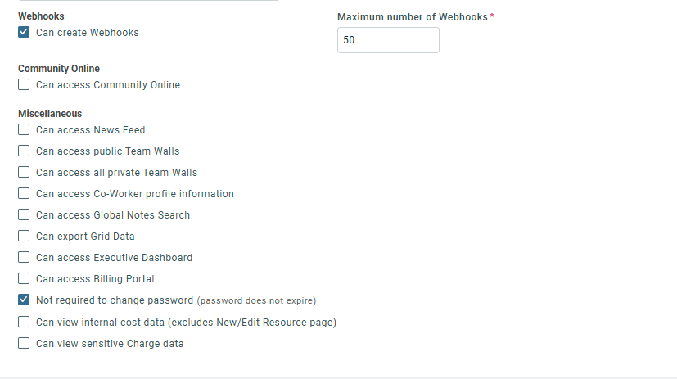
Check Can create Webhooks, so Autotask can push ticket changes to Uniportal as they happen instead of Uniportal having to poll for them. Also check Not required to change password: this is a service account nobody logs into by hand, so it shouldn't get locked out by a password expiry policy built for people.
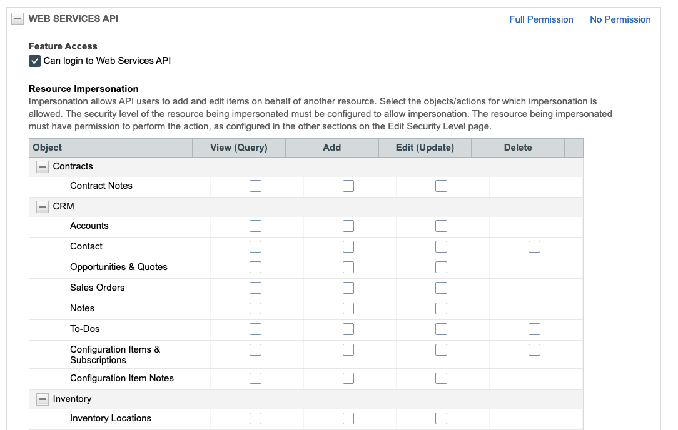
Under Web Services API, check Can login to Web Services API. This is the actual switch that lets the account authenticate against Autotask's API at all, everything else above only matters once this is on.
Click Save & Close.
Create the API user
-
Go to Admin > Organization Settings & Users > Resources/Users (HR) > Resources/Users.
-
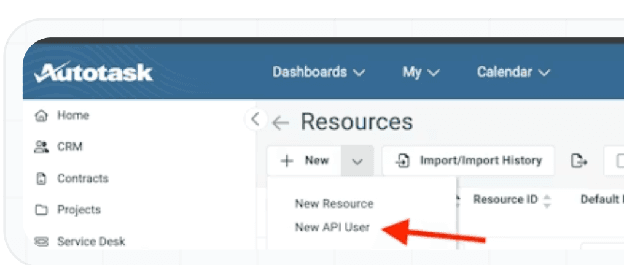
Select New > New API User, not New Resource, an API user doesn't count against your licensed resource seats.
-
Fill in First Name as
Uniportaland Last Name asAssistant, so the account reads as "Uniportal Assistant" in Autotask's user list. Enter an Email Address (this doesn't need to be a monitored inbox, Autotask just requires one), and set Security Level to the Uniportal API User level you just created.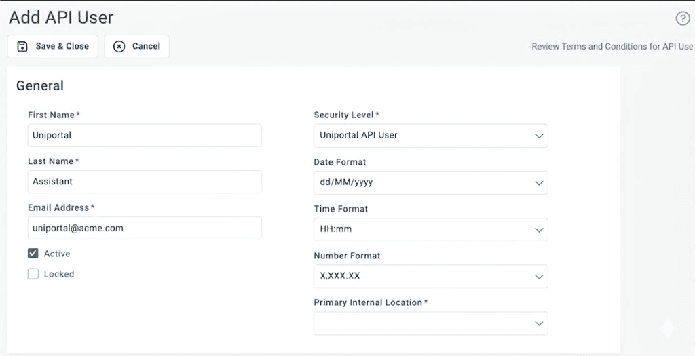
-
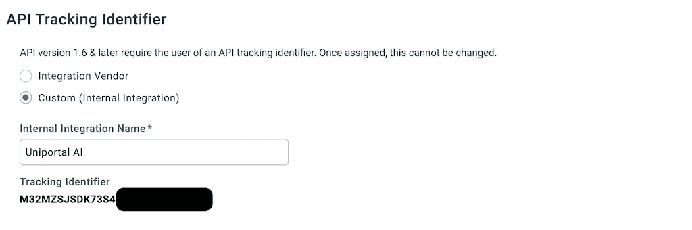
Under API Tracking Identifier, select Custom (Internal Integration) rather than Integration Vendor, since Uniportal isn't a published Autotask marketplace app. Name it Uniportal AI, and note the Tracking Identifier Autotask generates, you'll need it to connect.
-
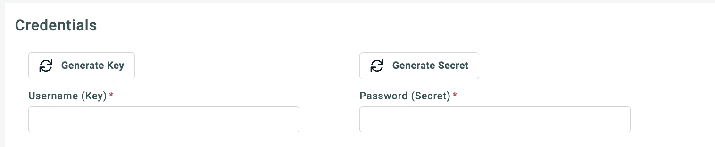
Under Credentials, click Generate Key and Generate Secret. Note the Username (Key) and Password (Secret) values now, you'll need both to connect.
Configure the integration in Uniportal
- In the Uniportal dashboard, go to Integrations.
- Select the Autotask tile.
- Enter the Tracking Identifier, Username, and Secret from the previous step.
- Click Connect.
Map companies and contacts
From the Autotask integration tile, map Autotask companies and contacts to the matching company in Uniportal. Select Auto match to let Uniportal suggest matches for you to review and approve, or match them manually yourself.
Mapping is what lets the AI find the right information fast. When a ticket comes in for a specific customer, the AI already knows which Autotask company and contacts it's dealing with, instead of searching for them. Uniportal works without mapping, but we recommend doing it: it's what most Skills and Agent Tools rely on to know whose ticket they're looking at.